Home › Astrophotography
Building a solar filter
Introduction
Visual sun observation with optical instruments (telescopes, binoculars, etc.) must be done with adequate solar filters: not properly filtering out sun light before it enters the instrument may result in instant damage to the eyes, apart from equipment degradation.
In this article I'll describe how I've assembled a filter cell with the Baader Planetarium solar film for my Meade ETX-90 telescope. As you'll see I've used a plastic lid from a powdered chocolate drink (Fig. 1) whose size is adequate for 90mm telescopes; for other objective diameters, it's a matter of finding a suitable size lid.
Prior to building your filter cell, please visit the following pages:
Required materials
|
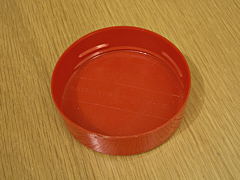
Figure 1
|
Construction process
All of the following steps must be executed carefully, especially while manipulating the Baader film.
1) Open a circular hole in the lid, slightly larger than the lens' diameter (Fig. 2). I used a knife with acceptable but not very good looking results.
1) Open a circular hole in the lid, slightly larger than the lens' diameter (Fig. 2). I used a knife with acceptable but not very good looking results.
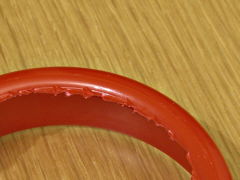
Figure 2
2) Using the X-Acto knife, cut two identical rings of paperboard (Fig. 3). Each ring should have an outer diameter sufficiently large to allow it to fit inside the lid with almost no backlash, and an inner diameter slightly smaller than the diameter of the hole previously opened in the lid. (Note that the inner circle of the rings must be smaller than the lid's hole, so cutting imperfections in the lid don't damage the solar film after the cell is assembled.) You may use a compass to draw the circles on the paperboard.
3) For each of the rings, cover one of the sides with double-sided tape (Fig. 4). Avoid crossing the interior of the rings.
3) For each of the rings, cover one of the sides with double-sided tape (Fig. 4). Avoid crossing the interior of the rings.
Figure 3
|

Figure 4
|
4) Cut a square piece of Baader film, with a side length larger than the rings' outer diameter (Fig. 5). Put the film onto a solid, plain and protected surface (for example, stretch a Kleenex or other soft tissue over a table, fixing the corners using common adhesive tape).
Figure 5
|
5) Fix one of the rings to the film by carefully settling it with the tape covered side face down. Before the ring touches the film align it with one of the corners, to facilitate the next step (Fig. 6). After settling the ring, press it against the film with the finger.
6) Turn the film to the other side (Fig. 7), and join the second ring, aligning it with the same corner you chose for the first ring (Fig. 8).
6) Turn the film to the other side (Fig. 7), and join the second ring, aligning it with the same corner you chose for the first ring (Fig. 8).
Figure 6
|
Figure 7
|
Figure 8
|
7) Using the scissors trim the excess film and tape tips from the resulting disk (Fig. 9).
Figure 9
|
8) Fix the disk to the interior of the lid using some glue. (Fig. 10)
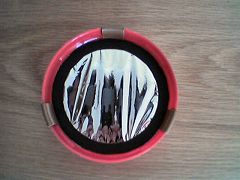
Figure 10
|
9) Fix three pieces of adhesive felt or sponge tape to the lid, folding them over the edge as shown in Figure 11. Do not fold the tape pieces too sharply – each tape piece should softly wrap the edge, otherwise one of the ends will tend to unglue.
IMPORTANT: The function of these felt or sponge pieces is to allow the filter cell to fit tightly and stay in the telescope without any backlash, so it does not fall off easily.
IMPORTANT: The function of these felt or sponge pieces is to allow the filter cell to fit tightly and stay in the telescope without any backlash, so it does not fall off easily.
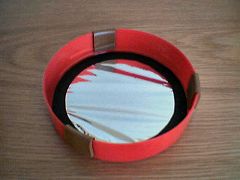
Figure 11
|
Final result
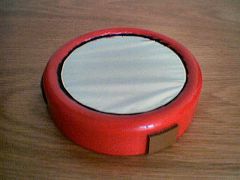
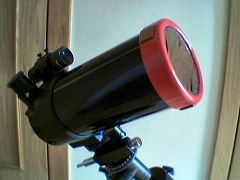
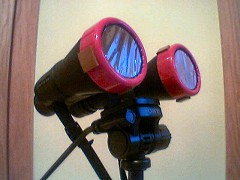
Figures below show the filter cell alone, on the ETX-90 telescope, and on a binocular, for which I've made two cells using smaller lids.
IMPORTANT: Before each use, inspect the filter with the naked eye by holding it against the sun. You must assure that there are no scratches, holes or other anomalies that may allow unfiltered light to enter the instrument.
IMPORTANT: Before each use, inspect the filter with the naked eye by holding it against the sun. You must assure that there are no scratches, holes or other anomalies that may allow unfiltered light to enter the instrument.
|
|
|
After assembling your filter cell, you can use the remaining Baader film to protect the chocolate powder container, which has no lid now:
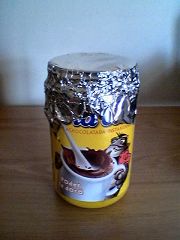
I'm kidding, of course. What you see in the picture is just common aluminum foil.
Warnings and important notes
- Make 200% sure that the filter cell does not fall off the instrument easily;
- Carefully check the filter prior to each use;
- Be responsible. Never leave a telescope unattended during daytime;
- Warn those observing with you of the importance of all these safety measures;
- Remember to also protect the telescope's finder, as the risks are the same as observing through the telescope itself; You must cover it completely, or build a smaller filter cell for it. Alternatively, detach it from the scope during solar observations.
- Store your filter safely in a protective container, such as a small (unused!) pizza box.
Tips and recommendations
- You can use the remaining Baader film to build high quality filtering glasses for observing the sun, useful for occasions such as eclipses or solar transits. For this purpose I have created a PDF document with a template for printing paper glasses (see file below). The template fits my head, which means it is probably too big for a children (or too small for others). If needed, you can always try printing the document with different zoom levels and proportions. Finally, to make the paper glasses as sturdy as possible, use the thickest paper supported by your printer, or glue the print to a piece of cardboard (e.g. from an empty cereal box).
| Paper glasses template |
- As mentioned above, you can also use the remaining Baader film to build a smaller filter for the telescope's finder.
